Please note that the RKMAC kit p/ns listed in this repair are for oil extraction application. For refrigerant recovery application, add the letter “N” (neoprene O-rings) to the end of the p/n.
Disconnect unit for power source and remove all hoses from IN/OUT ports.
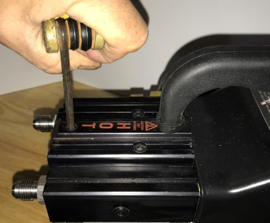
Remove the 3 bolts on the handle/plate assembly to expose access to the discharge valve sealing plugs.
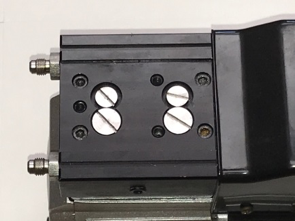
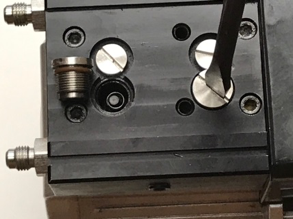
Remove the two larger slotted sealing plugs as shown above.Note, use an extra wide flat tip screw driver.If the sealing nut is made of brass, be careful not to damage the slot.
Once the sealing nut is removed, remove discharge valve and spring.

a. Inspect discharge valve for blemishes or foreign material on the valve’s sealing surface.Use a soft cloth with alcohol to remove any residue from the sealing surface.If required, replace the discharge valve.Order p/n RKMAC-7.
b. Inspect the spring for damage.The spring should measure more than .400” uncompressed.If required, replace the spring.Order p/n RKMAC-7.
c. Using a flashlight, inspect the compressor head discharge valve sealing surface. Take care not to scratch or damage the metal seat in the head. Use a soft cloth or Q-tip with alcohol to remove any resin from this seat.
d. Check O-rings on seal nut for damage. If required, replace. Order either p/n RKMAC-7 or RKMAC-8.
Once complete, reassemble and retest per theTR and TRS Piston Seal Diagnostics


Comments